Showing posts with label Altered items. Show all posts

Sunday, April 8, 2012

Birthdays, Birds and Being Happy


A sweet little card for a summer birthday. Love love LOVE the soft blue! So many things to get ready for this month...and a messy art room does not help things. LOL I hope you find peace and joy this week. And maybe some time to go for a run in this glorious sunshine! xo

Tuesday, October 4, 2011

It's a country thang


It's really no secret. I loooove texture. I stick things on scrapbook pages that most people throw away. So when my neighbour's lawn was littered with birch branches I pulled a quick "thief in the night" escapade and gathered up a bunch. I used some on my Brown Eyed Girl layout. And some went on this sweet little card I made for a gorgeous country wedding we attended. We sat on hay bales under a brilliant sun surrounded by swaying trees and listened to my cousin and his new wife exchange their vows. It was so natural and beautiful. Don't get me wrong...I love zipping around in my convertible with a Starbucks in my hand. But I never forget my roots. I still know how to milk a goat, ride a horse and drive a tractor. I think it's that country thang that keeps my scrapbooking earthy, simple and touchable. Glue some nature to your pages. You'll love it!

Saturday, June 25, 2011

A Party For Poopsie

My little niece {who I have called Poopsie since she was born!} hit double digits this year. Shut up...I know, right? When did she get so grown up?! My sis put on an epic rock star birthday party and Poopsie was the main attraction. She wanted something to give to her friends that was crafty and fun. So over to Auntie's art room she came and we cranked out these adorable take away containers for a dozen of Poopsie's closest friends. The die to make the container is compliments of Just Scrap It! and was super easy {and cheap!} to put together. One sheet of 12x12 white card stock per container. Easy Peasy Lemon Squeezy.


My sis wanted an artsy activity for the girls to do at the party so we left the containers completely blank. A wonderful canvas for many Camp Rock and Justin Bieber stickers and of course gobs of glitter and jewels! But Poopsie wanted to put her own sparkly flare on it and settled on a great new cupcake stamp set I bought last summer. She stamped, stickled and gemmed the tags all on her own! I was SO proud. A little hand written message and I thought we were done. But my little Poopsie likes glittery things almost as much as I do so we added some jump rings and an assortment of charms and beads to the ribbon handle. Simple. Cute. Fun! Home made gift bags do not have to be expensive or complicated. Poopsie's Mama filled them with hair accessories and lip gloss. Perfect!


Friday, February 25, 2011

Art...and the freedom to create it

One thing I struggle with on a daily basis is the cleanliness of my art room. I am fortunate enough to have an entire room to create whatever I want...and more often than not I am either creating on the floor in the living room or not creating at all because I can't breathe in my room. That is an absolute travesty. If I am not using the room, I shouldn't have the privilege of having one. Period. So I was discussing with the Hubs last weekend some cost effective options to fix the issues I had. Yes I would love to rebuild my studio all custom and matching and wonderful...however...I am also realistic and know that this is not our "forever" house. So it would be a shame to spend the money, time and effort only to have to say good-bye to it in the coming few years. I wasn't expecting what happened. Hubs took a look at what I was thinking of and said "ok". That was it. And the discussion ended and I thought maybe we would look into some building materials next month. I was fairly pleased with the space I had at that moment because my friend Corinne had come over to spend a few hours helping/telling me what to clean and directing me in my purge. Her favourite thing to say was "Just let it GO Kate!" It was a fabulous time! So I have to admit I was a touch disappointed when I came home the afternoon of said discussion with the Hubs to find my room in ruins. Absolute chaos. With Hubs in the middle of it with his tools beside him telling me to come clear off my desk because it was going bye-bye. I had no time to process what was happening but he obviously wanted to get a move on with the project. LOL These "before" photos are from several months ago. This was the room at it's worst and it had taken on a nasty personality all of its own.

View from the door:
Big shelf/extra desk space. I forgot to snap a pic of the top of this shelf where all my project boxes and albums were kept. Oh my word. Let your imagination run wild.
Peg board and original desk space. Wait a minute...is there even a desk under there?!?


Childrens area.

In the months since this photo I did a few things like getting rid of the 6ft kids table and opting for a desk with drawers. And of course did a bunch of cleaning and purging. But I still had hot spots that were hard to control simply because things were piled on the floor and had no storage. Insert the Hubs and his need to complete projects right now.
Soak in the before photos...and I will post after photos next week. They rock!!!

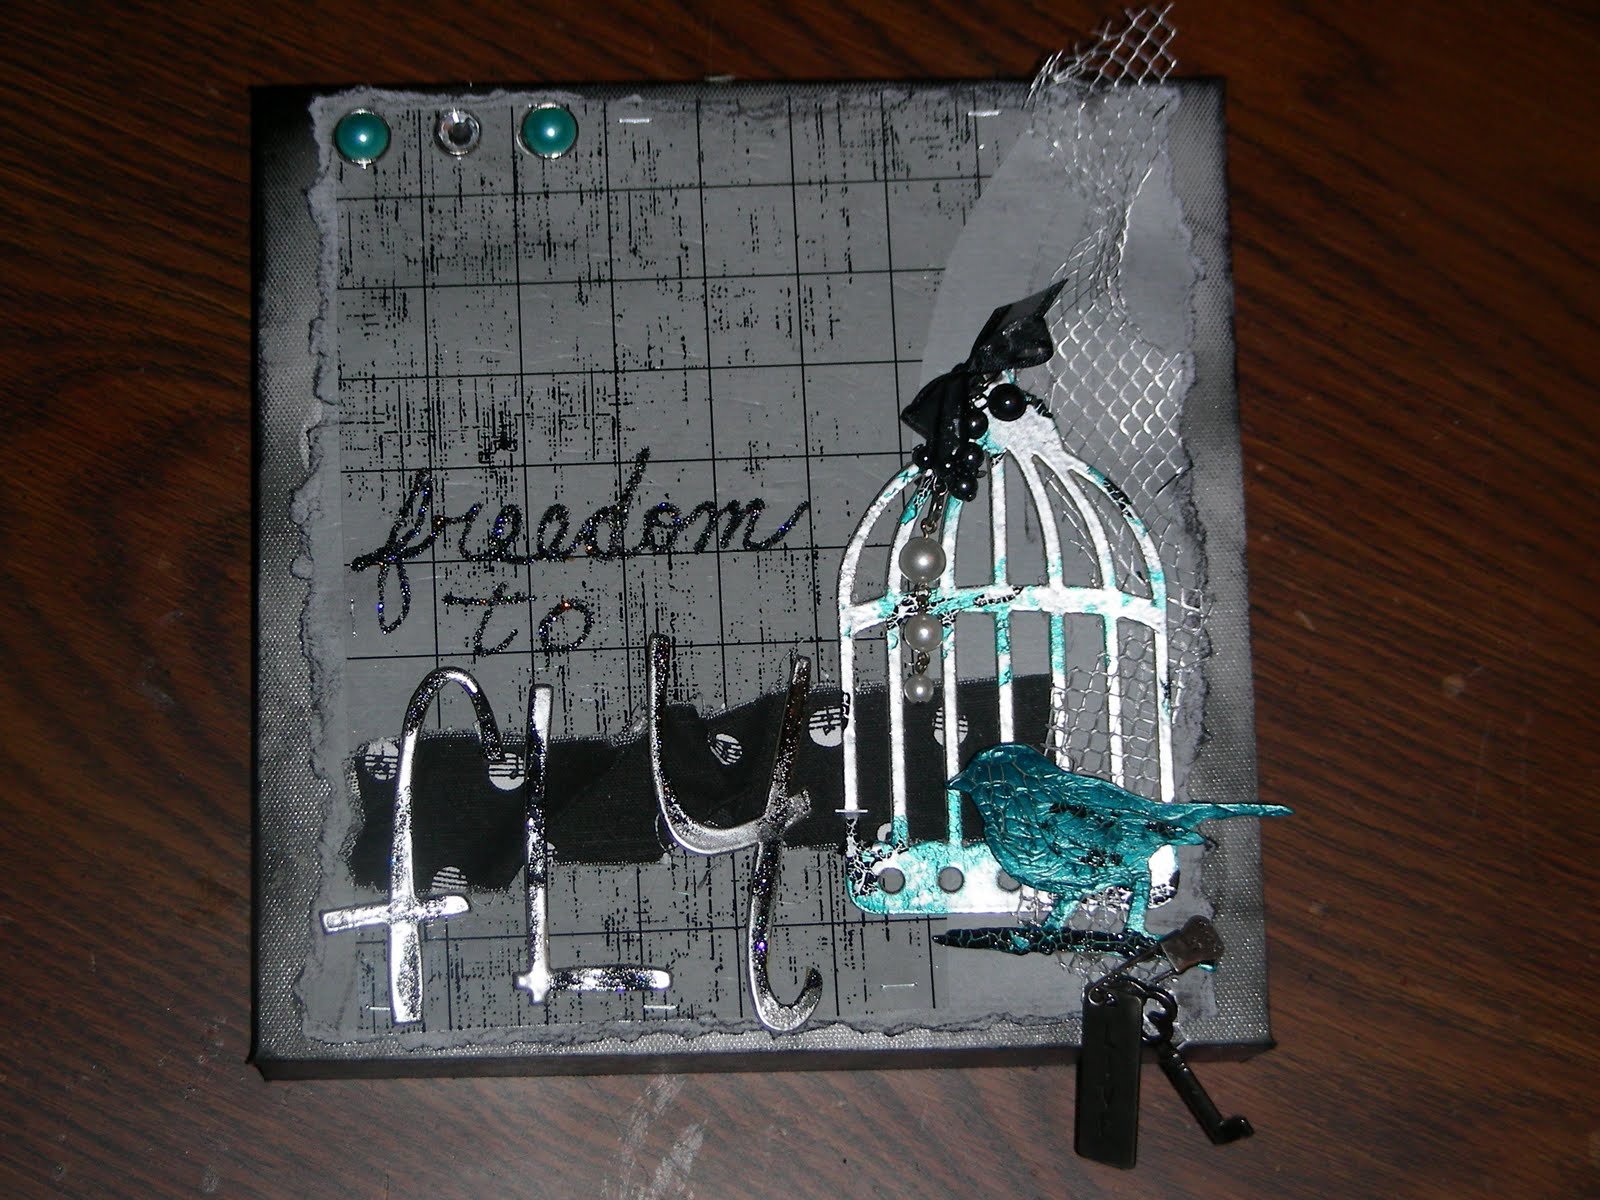
Here is a little something I created on the floor...LOL. I have been so in love with birds in the last year. This is an 8x8 canvas with some Tim Holtz, Hambly & Elsie Flannigan, ink, metal, bling and a bunch of crackle paint. I love shabby chic home decor!
What does your space look like? Does it make you happy? Do you need some inspiration and encouragement to change it? Leave a comment and send me a link! I'd love to see it! xo

Wednesday, January 19, 2011

A Starbucks Book Tutorial

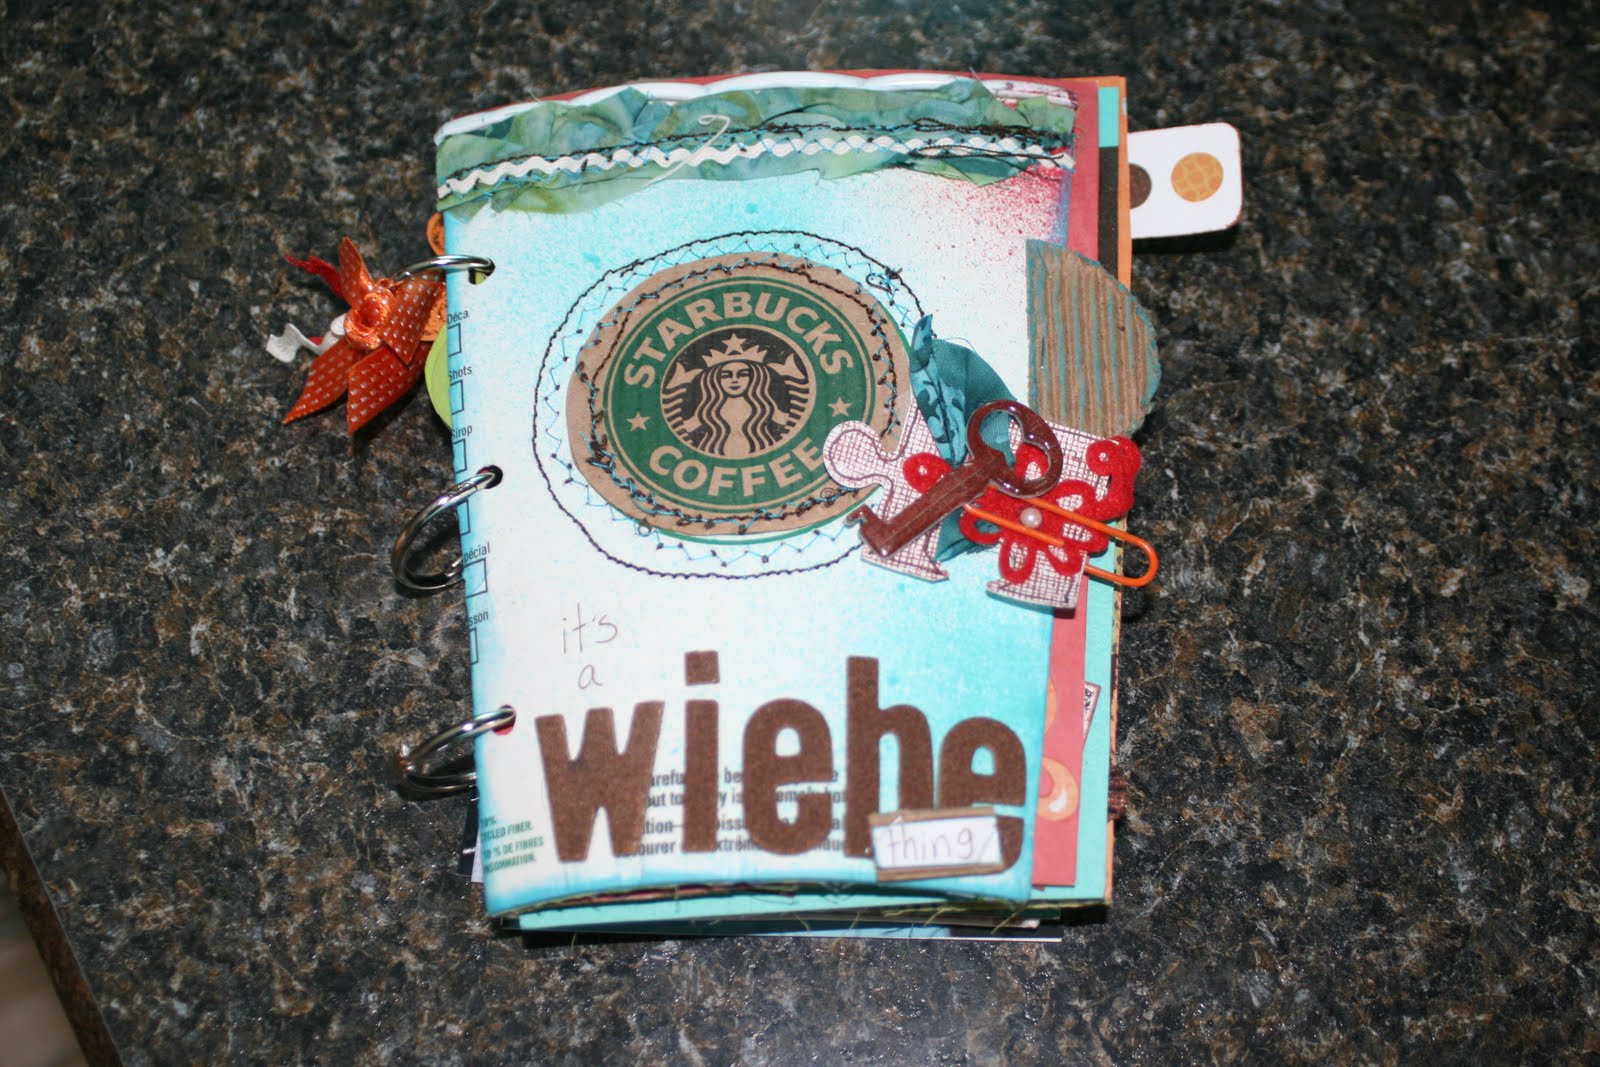
This was the project I did while I was at the Bloomin' Inn because I was told there would be plenty of space to haul in my sewing machine. There totally WAS. It was so great. My good friend Char had asked me if I would do a Starbucks book for her after she saw the one I made HERE. Now I certainly am not going to lead you to believe I invented this idea. I love to blog hop and several years ago I saw it on Wilna Furstenberg's blog. I enjoy her style so much and she is delightful to take a class from. She had posted this digital Starbucks book project on her blog but...I was not doing any kind of digital at that time so I just ran with the initial idea and made it my own. Now I love them so much I ask for extra cups every single time I am in Starbucks! Which reminds me...I need to collect up some more before they bring in that hideous new logo. It is so not for me. But I digress.

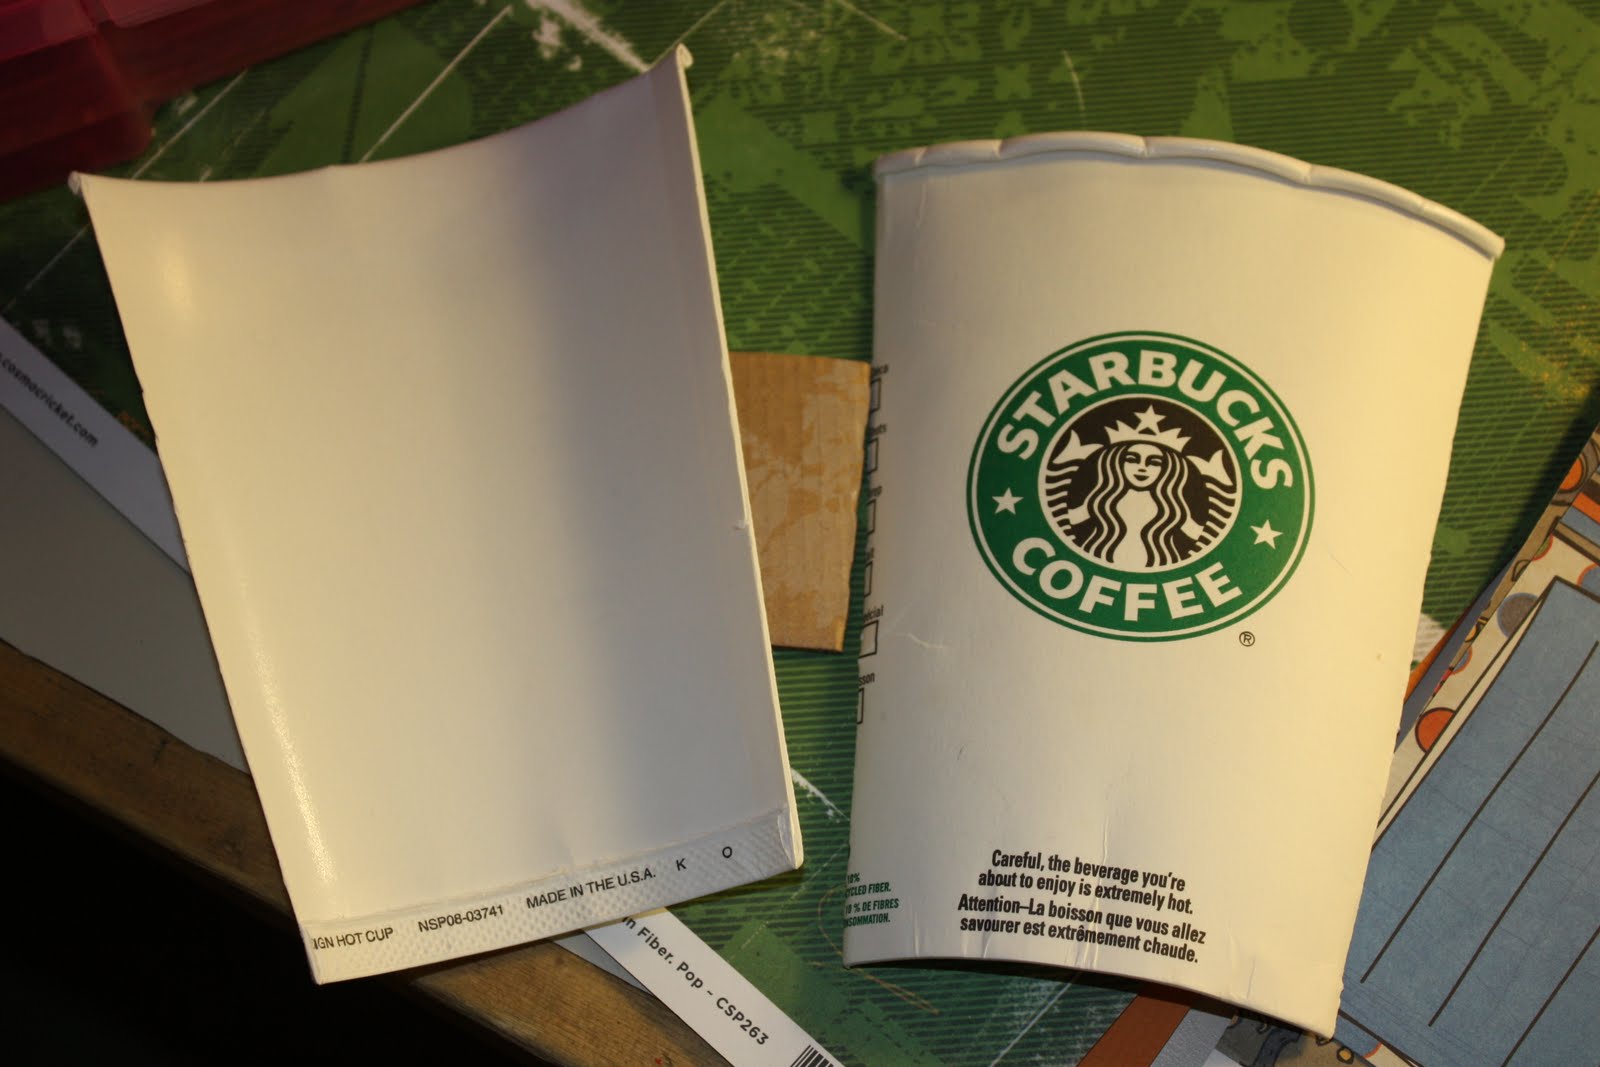
Start with a cup and a cardboard sleeve. Carefully cut the bottom out of your cup. You can use any size but make sure it is a new cup...I have never had success washing a used cup unless you dig that wrinkled wet paper look.
Flatten the cup and cut up both sides to form the front and back covers. Cut out the Starbucks logo from the cardboard sleeve leaving as much extra around the green circle as you can. Now if you are a very clean and straight scrapbooker this may be stepping out of your box. There is nothing precise about these books. They are very gypsy looking and are not meant to outlive your grandchildren. So toss aside the ruler, get out all your bits and bobs and just go with it!Note*** I accidentally cut really close to the green on this one. I usually leave as much cardboard as I can so I can sew this circle onto the front cover***

I use the front cover as a guide to trace out as many pages as I want. Use good, heavy card stock or chipboard! Remember, not everything needs to accommodate a photo. I love to put in pockets, transparencies, little journal tags and whatever else strikes my fancy. So the pages I do here are only a base. Watch out if you use a trimmer while doing this...the pages are somewhat V shaped. Smaller at the bottom and wider at the top.

Then I start with the front cover and work my way to the back! The covers are always my favourite because they can actually handle quite a bit of abuse. I like to do really heavy sewing on them...it makes me happy. But first I dive into a little ink and glimmer mist just to give it an interesting base.

And then hop on the sewing machine to make it look like this. I love to use the extra cardboard for making tabs. And what project is complete without ric rac? I take the front cover just to this point...there is MUCH more I want to add but I still have to bind it. So stop yourself from adding and move on. Just for now.

The inside of the front cover. I stamped it with a messy background stamp and added the chipboard buttons to dress up the sewn circle. If you don't know what else to go with, a stamped quote is a nice go-to embellishment. It had a good number of pages so I will just highlight a few. I used scrap fabric to create a pocket and tag.
The green cloud is not part of the page...it will hang all on it's own as a smaller page. Don't be afraid to mix it up and add different sizes and shapes! This type of book is wonderful for using up scraps of things you didn't want to throw away but had no idea what you were going to use it for. I have a whole Rubbermaid bin full of stuff that falls into that category!

This photo actually shows 3 separate "pages". There is the base page, the cute little polka dot transparency and the chipboard key which attached to one ring and kind of nicely hung out all on it's own.


Inside the back cover. I have a thing for bar codes.
Back cover. Love that sewing. It adds so much texture.


When I am done all the pages I put them all together and see what my best plan of action is for binding. I generally like to use the metal rings...2, 3 or 4 depending on the size of the book. You could also sew it together (my poor little EuroPro!) or use a Cinch or a Zutter. I happen to have a Zutter but I find for this project I don't like how the coils sit. It's all a matter of taste. So I line up the front cover how I want it and punch the appropriate amount of holes with my Crop-A-Dile. Then I hold the next page against the cover and punch it too. Then the third page against the first page and so on and so on using the previously punched page as a guide for the next page so it all lines up.
When I am all finished lining up, stacking and binding I finish blinging up the front cover and add ribbon to the metal rings. You can use as much ribbon as you want...I just put 3 pieces on the top ring for a little more embellishment.

Funny side note...I happened to use a bunch of chipboard puzzle pieces on the cover and on a few of the inside pages and Char got all excited about it and thanked me for using them when I gave her the finished book. I was a little confused. Um...you are welcome? For using puzzle pieces? Then she reminded me that the puzzle piece is the logo for Autism Awareness. Char's youngest is autistic...and I had forgotten about the significance of the puzzle piece and just used it by accident. Wonderful coincidence! It's a God thing. xo

Sunday, October 17, 2010

Catching Up

Saying that time flies is an understatement wouldn't you say? If you stop to take a single breath several things get left behind and all of a sudden you haven't blogged in 2 weeks, Mount Washmore starts to take over the laundry room and you wonder where all the spoons went. The CIBC Run For The Cure took up a lot of time and energy but it was SO WORTH IT!!! Our team, the Bandanna Bandits, took the top prize for the most donations from a team of family and friends. What an honour! We raked in over $17,700 to help defeat breast cancer. It was a truly amazing experience. Now that that has died down a bit and life has gotten back to normal, I got a handle on the house, threw an epic birthday party for my boy and even cleared a path to my scrapbooking desk. Shocking, I know. I am actually going to share pictures here of the before and after. No big redesign or anything, it's just mind blowing how much crap was in there. Stay tuned.

And lately I have been trying to make a few Artist Trading Cards. So fun and cute! It's so much nicer than scrawling my blog address on a scrap of card stock and giving it to someone, don't you think? There are many fabulous ways to display these little babies and 7Gypsies is one of my fave companies so it is highly tempting to start collecting these from other artists. This is one I did with some Kiki Art product. A big thank-you to Linda Shewchuk for sending me all the goodies! Kiki Art is not sold here in Saskatoon but hopefully that will change someday soon. What a great Canadian company. I am also working on a blog post from waaaay back in the summer from when I went to the Bloomin' Inn in Pincher Creek, Alberta. Some girls there wanted to see my first scrapbook page. And I like them enough to actually show it here. LOL I am trying SO hard to convince them to come to Sask Scraps next month. If you have attended the event before leave your best experience in the comments to try to convince Janis and Keri to come on down to our fair province! These girls consider themselves "beginner" scrapbookers and think they annoyed me by borrowing my stuff. Don't believe them, it's a lie! They were a riot and completely inspired me the whole weekend. But I'll leave the details for another post. Have a wonderful week! xox

Monday, September 13, 2010

Warm up with some Tea!


Fall brings the need to be cozy. Wool socks, big sweaters and a giant cup of tea cradled in between both hands. And what better way to enjoy those thing than with some close friends? A sweet inviation for tea with some Bo Bunny product. How long has been since we had tea? Come on over! The muffins are in the oven. xox

Thursday, August 5, 2010

Do you carry pictures of your kids?

I am a scrapbooker who is horribly guilty of not carrying updated photos of my kids. *blush* So lately I have been making more of an effort in this department and with the Hubs travelling for work so much I have been seeking out highly portable ways to do this. Men like things that fit in their pockets. Portable, light weight, easily accessible, to the point. So I saw this little magnetic notebook at Michael's and thought I could do something with it.
My son had already written in it but you get the idea. LOL So I tore out some of the pages, then glued a whole stack of the pages together to make 3 separate thick pages. Inked up all the edges because ink is so very forgiving on something like this, covered the outside with pattern paper, used gaffer tape on the edges, trimmed up the photos, added a few rub ons and voila. A pocket album for when my Hubs is gone for weeks at a time.
I held it all together with a matching blue rubber band because the gaffer tape prevented the magnet from doing it's job but after a while the book kind of flattens and settles and the rubber band is merely to keep the pages from falling out when the book has been looked at a gazillion times. This took no time at all and helps my love hold his loves close to his heart. xo

Monday, December 21, 2009

CMHA and a little Christmas Craftiness

When we moved back to town I was surfing Kijiji (LOVE that little gem) and came across an ad asking for a volunteer scrapbook teacher. And I thought to myself, "Self, YOU volunteer. YOU scrapbook. YOU have 19 boxes of amazing donations that you could bless others with." So "myself and I" gave Sandy Stotz a call at the Canadian Mental Health Association. What a sweet, sweet lady. I started with them back in September and we have done some wonderful projects. Like these exploding boxes:


Now that particular creation isn't my own. The pattern I used last Mother's Day was too large to do with a big class so I lifted this pattern off this fab blog Glitter Adventure. The dimensions were perfect and not too overwhelming for a beginner. They turned out great!

CMHA also threw my profile up on their website. Check it out HERE. I'm super excited to begin our "All About Me" scrapbooks in January. Up to this point, I have taught them cards and single class projects to get everyone used to the process. In January we break out the scrapbooks!
With all the cleaning, shelf-making and organizing going on in my scrap space I think my art stuff is calling me today. Even though I have more baking to do, the elctrician coming at 4pm, children to entertain and a workout to manage. I can fit in some creativity, right? It wouldn't be a good day without it! Go have a good day! xo

Monday, December 14, 2009

Create on a budget (aka the "I hate money" post)

Ok, so I don't actually hate money. I am frugal enough that we can live on one income and I shouldn't complain about that. Life is great and we are blessed. But I do whine {on occassion} about my lack of extra money for all of those yummy crafting supplies that call my name when I wander the aisles at several stores in town (oh who am I kidding...in town, out of town, online...). I mean come on...if you won the lottery {besides paying off your house} where is the first place you'd go for a huge splurge? Scrapbooking. Supplies. I actually get a little shiver even dreaming about it. So a lot of the time I have to settle for trying to repurpose what I already have. I am no crafting genius {I leave that to my friends!} but I was so super impressed with myself for this little gem I had to blog it. My oldest son wanted to decorate his room with popcorn strings which was great...I had several cups of stale popcorn kernels just waiting to be strung. But I thought...how can I make this cooler? And that started a journey that ended in a mess. And that's just how I like it! Start with air popping your kernels. Do not add butter (even if this does go against every fiber of your being) Try to stop the little fingers from eating it...go ahead, I dare ya. You just might lose an arm.

Use quilting thread so it won't break. Be careful not to poke yourself.

String popcorn until your back hurts and your fingers are numb. Then continue for just a few minutes more. Until it looks like this. Oooorrrr maybe until you get sick and tired of stabbing yourself and you cut the thread, deciding that that is long enough. Um yeah, it just may have happened like that at my house.

Ok, for this next part I have no photos because it was super SUPER {deliciously} messy and I didn't want to bring my camera anywhere near that. So you'll have to settle for a rather loose description. The background info being I thought it would look much cooler if the popcorn was coloured. So I went through my card catalogue brain on all the possible ways to colour it without making it melt. Because popcorn does that. Wet+popcorn=goopy mess. I finally settled on Glimmer Mist! GENIUS! So I laid out a towel on my work surface, put plastic bags on top of that and sprayed to my little hearts content. It was grand. At the end though...there was a huge puddle of glimmer mist floating on the bags. And I absolutely could not waste it. {Refer to the opening of this post} so I took care of another thing on my holiday to do list by dipping a whole bunch of tagsinto the puddles. (the ones you can pick up at Staples for less than $5 for a box of 100) They came out beautifully and now I have some holly jolly red tags to attach to every single gift we are giving this year. I'm going to stamp the recipient's name on it in black ink and handwrite on the back who is from. Oh, and the popcorn strings turned out great too, don't you think? It looks like cinnamon popcorn. Oh shoot...making that is on my holiday list too. Must get on that!

You can make it as light or as dark as you want just make sure you spray it and don't dip it. I found that I had to keep moving the string on the table so it didn't soak in the puddle or it became so saturated it just looked black. If you were really energetic, you could pre-spray the popcorn in old bowls, lay it out to dry and then string it with alternating colours. Maybe next year. xox


Monday, December 7, 2009

Is it Spring yet?

Guess who got a very important e-mail this week?! Woo hoo! Be sure to pick up the Spring 2010 edition of Canadian Scrapbooker Magazine. Darn I looooove seeing my art in print!
I've been creating more and more...in between cleaning the scrap space. I have insane photos to share here later in the week. They are not to be believed. I'm shocked the children survived. If we had a cat, we would have lost it for sure. LOL
Like vintage tags? I do! I'm SO surprised I didn't set the smoke alarm off with these. Ever played with fire in your scrapbook room? You should try it sometime. It freaked the Hubs right out. Tee hee. Burn some paper, melt some wax. It helps you forget that it's -31 outside. xo

Thursday, December 3, 2009

Well...at least it hasn't been a month...

Ok ok...long time no blog. I know. But SO much happens at this time of year and I am not talking about Christmas shopping (that's done). On to more important endeavors! I am wrapping up a circle journal rotation (SO FUN) and of course following the 12 Tags of Christmas by the one and only Mr. T!m Holtz. I seriously love his techniques. I really, really need to get over to Staples today and get more tags. But I digress...

Remember back in the summer when I had my little rant about the rude woman in the line-up at Starbucks? No, of course you don't because you have far more important things to keep in your head than my rants! LOL You can read about it HERE to refresh your memory. Well, true to the natural course of my life shortly after I posted that all medical heck broke loose in our extended family and the rest of the summer was spent putting the art aside and taking care of ours. Fall led into some catching up around the house and yard and by the time November rolled around I was ready to dive in again. Head first. No goggles. I have proof, you should see my scrap room. So I finally, finally got something 100% amazing created for Danya at Starbucks and I will drop it off to her tomorrow. I hope she likes it.


Go cut up a Starbucks cup and make something out of it...the red Christmas ones are SO adorable. Happy scrapping! xo

Tuesday, October 13, 2009

Just sweet boy stuff. Because I have sweet boys.

Sometimes stuff can be simple. Most of the time I am of the mind that to be good and satisfying, a layout or altered project must take a hundred years to complete with nine thousand seperate steps and have my blood, sweat and tears attached to it. Well, blogging friends, it just doesn't have to be that way. This little gem took me less than 20 minutes to complete from initial idea to ink dry and I LOVE it!
I just grabbed a piece of cardboard, cut it 6x6, distressed it up and smooshed green ink onto it. Then I stapled on these wallet size photos which I am completely smitten with of course. Stamped some green circles with these great circle stamps from My Stamp Box, cut them out, glued them on, covered them with Glossy Accents, stapled on the bit of twill that says "A boy is a joy", used the same for the hanging part (just turned backwards) and Voila! Bathroom wall hanging a la Kate. But I took the picture on the deck because my bathroom light is not very cooperative for getting good photos. It's a little messy and simple and the colours are me. I didn't have to cry, I didn't bleed and it took no time at all. Maybe I am learning something here. xox

Sunday, October 4, 2009

Enough goofing...how about some scrapbooking?

SO nice to goof around with friends this week on my blog but let's get down to work, shall we? I really have been working. In my amazingly well designed (for me) space that my husband has been diligently working on. It ain't pretty but boy is it functional. Sure, I'd loooove to have a space that is all Ikea matchy-matchy with pretty shelves and jars and many fabric lined baskets but that just isn't in the cards {or the budget} right now so I will settle for re-purposed wood, used brackets and an ugly but totally useable desk with a cool removable work surface. That my husband built with his own 2 hands. As soon as I get everything squared away I have full intentions of posting pictures. And good intentions pave the way to hell. No really, I'll get it done because I have big plans for many, many projects this week. It's exciting to go down to my room and not cringe! A couple projects last week that I didn't hate:

I started out here with a completely blank white chipboard tag and challenged myself to use stamps. I inked it with the teal and pink then tried out some foil along the edges. Never played with foil before...I like it. You may see more of the foil. Then I stamped some snowflakes in VersaMark and used clear embossing powder (picture=no justice). Burned myself with my heat gun (why does that thing get the better fo me every time???) I stamped the cute little birdie and the sentiment in black then coloured said birdie with markers. I think I would maybe change the ribbon colours next time but I had no pink ribbon that I liked. Fastened it on with my new love*, added the silver snowflake sticker and 7Gypsies dangle.

This one I started with a blank sheet of white cardstock. Apparently I need a lesson in blending...that part didn't match my initial vision. Oh well, on with the show. Everything is stamped except for the stiches and handwriting. I never change anything...I just consider it 2 photos down, 9,369 to go.

*New Love= THIS:


I held off for a long while...I mean really, it's just a stapler right? I have lots of sizes of staplers. But OH is it ever SO MUCH MORE THAN THAT! I enjoy making tags and attaching small items to my layouts and the staplers were so flimsy. This thing is like butter. Try it out. You won't be disappointed!